Introduction
This article is a follow-up to the installation guide for OpenVAS. We will discover the web-gui and
figure out some main functions of the openvas-scanner and how to use them.
Running scans with the Task-Wizard
When we run the first time a scan, we go to Scans and click on Tasks. Now we can choose between
the Task-Wizard and the Advanced-Task-Wizard.
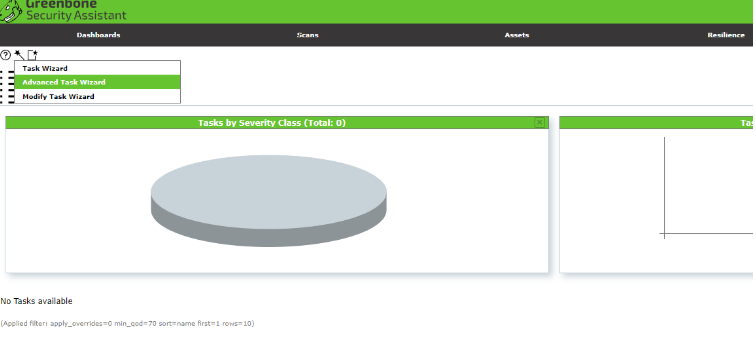
The Task Wizard is very basic, here we have only the option to set the ip-address/hostname of the
target. The Advanced Task Wizard offers some more options. Here we can set the name of the task
and can choose between different scan configurations. We can also schedule the task if you want to.
It’s also possible to set credentials for the authenticated scan. If needed we can set a mail address,
fort he case we want to receive the report via mail. By clicking on create we create the task.

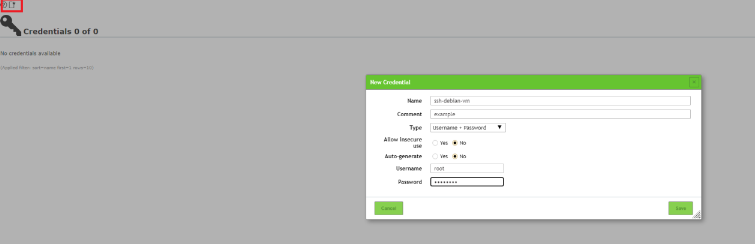
Why transmit credentials for a vulnerability scan?
With OpenVAS you can simulate an attack from a remote invader and also from the internal user
(this can be an administrator or a user). The credentials can be set at configuration → credentials.
After adding the credentials we can choose them from the list at the advanced task.
In our scenario we run the task immediately. The first status is requested after a short time the scan
will start. In older versions, the progress bar will show 1% for a longer time, but don‘t worry this is
normal. The task will also generate a 100% workload on itself. But this will even unbend and the
progress bar will continue. In our version 21.4.3 this bug is fixed.

Reports
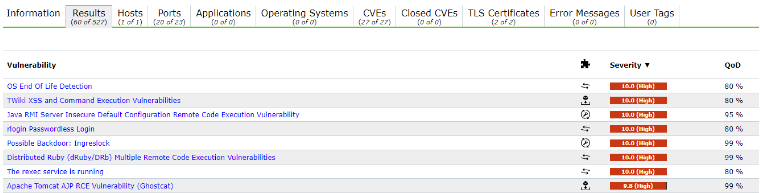
After the scan is finished we can click on reports, we can the results of the scan and the classification
of the vulnerabilities that were found. By clicking on the date of the scan we can view the detailed
list of the vulnerabilities. The QoD (Quality of detection) –row gives us an assessment of how reliable
the found is. Proposals to fix the problems are displayed as little symbols in the solution-type row.
If we want to know more about one specific vulnerability we can just click on the entry.
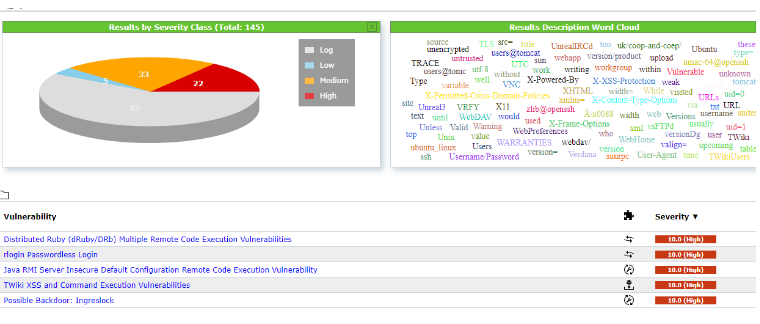
Results
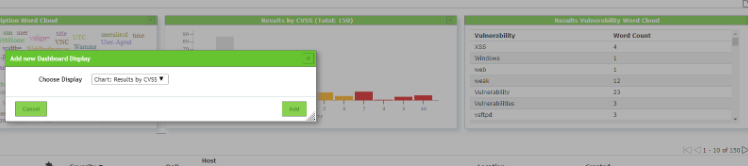
Another view of the vulnerabilities can be found at scans → results. Here we get a graphical overview
of the different vulnerabilities grouped by their severity class and in a word cloud. By clicking on one
entry in the word cloud we activate a filter. The filter which is triggered by clicking in the word cloud
is displayed in the input mask. This is very useful to understand how the filter work. Play around with
some filter options to get a feel for it.
You can also add more visualizations to the overview. Just click in the left corner on the square with
the star.
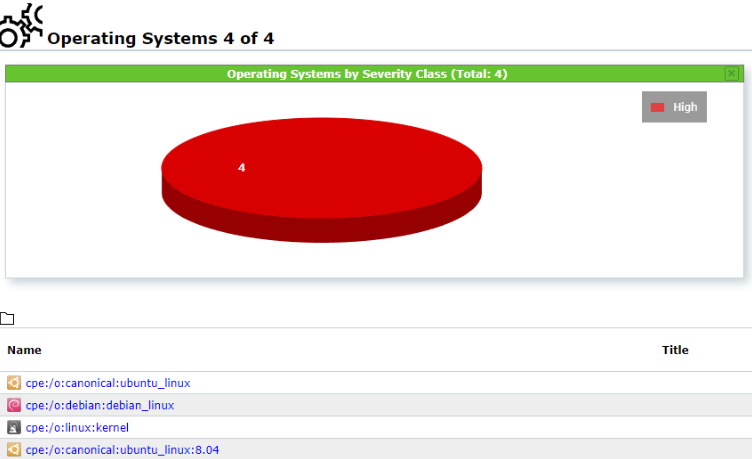
Assets
Here we get an overview of the scanned systems and different operating systems that we scanned.
This can be very useful when we run multiple tests on different systems. For example at an in-house
penetration test.
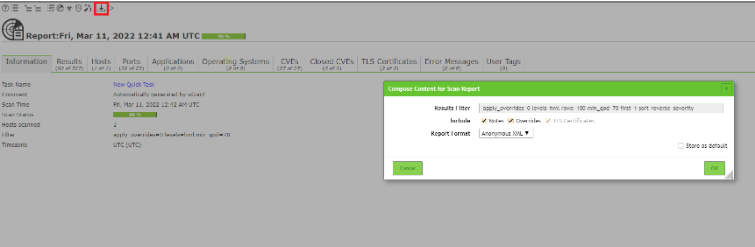
Exporting Reports
At the we end we want to export our scan-reports to edit them in another program. For this we
navigate to Scans → Reports. There we click on a report, choose a format that we want and
download the report.
🖤 Did this article help you?
Buy me a coffee and support my work to keep this space 🚀 and ad-free. If you can’t, share my work to reach this 📖 out to more people.