In this guide we will discover different use-cases of Wireguard-VPN and how to install and setup different configurations on different firewalls and so on. The individual ones will not be published directly, I will update the guide over time.
pfSense
First we will use Wiregaurd to tunnel into a network behind a pfSense.
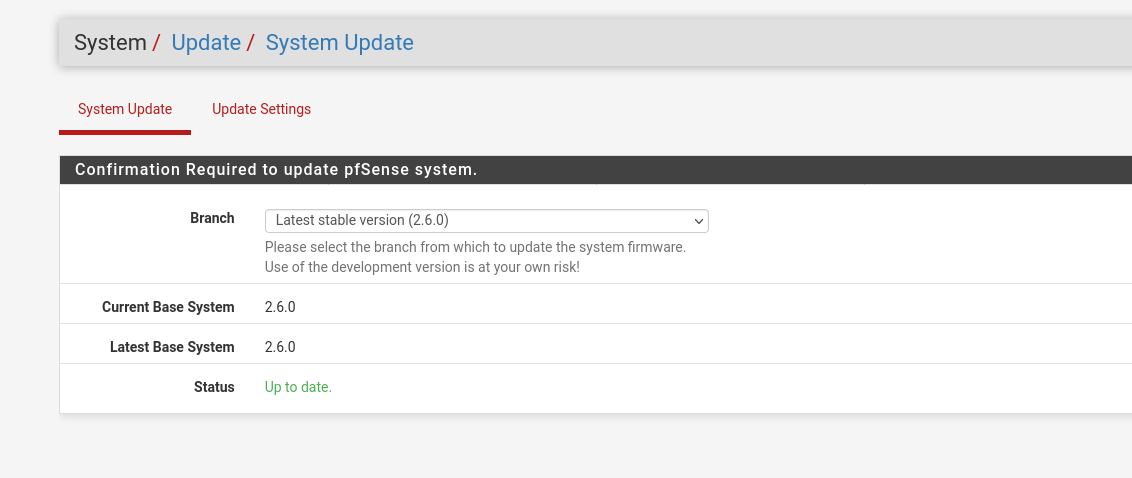
We start with that we check our pfSense for updates:

If anything is up to date we can move on and install the Wireguard extension on the pfSense:
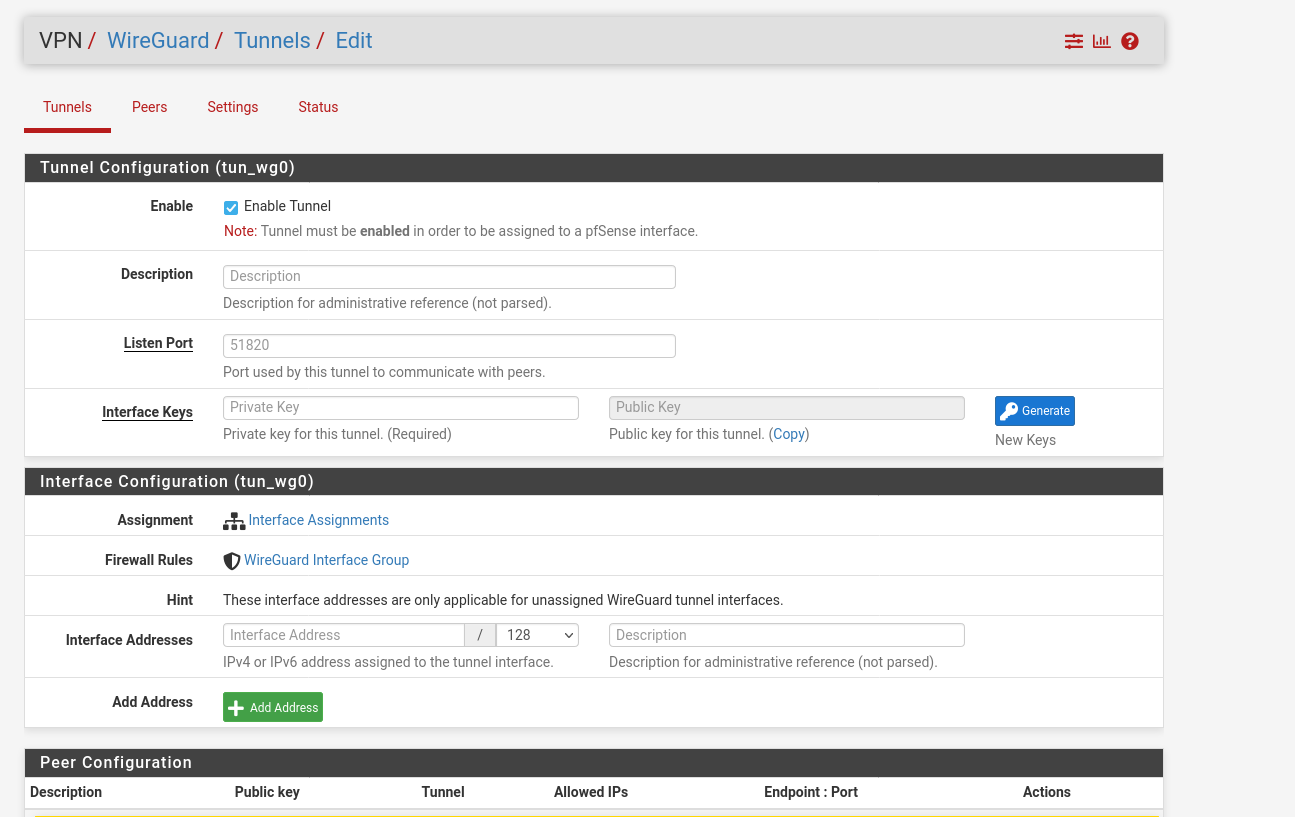
Now we can find the Wireguard option at the vpn index tab. Add a new tunnel and generate a new key-pair. Save the public-key, we will need this for the client configuration.
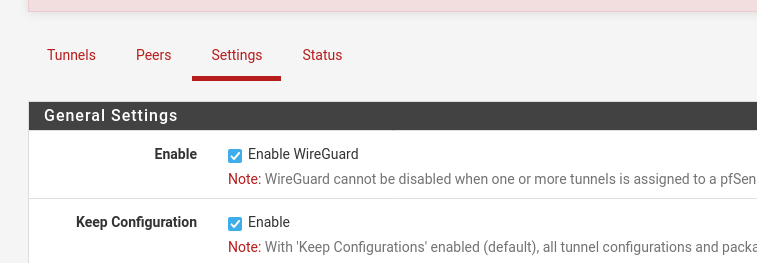
Save the configuration and go to the settings tab, there you can enable Wireguard.
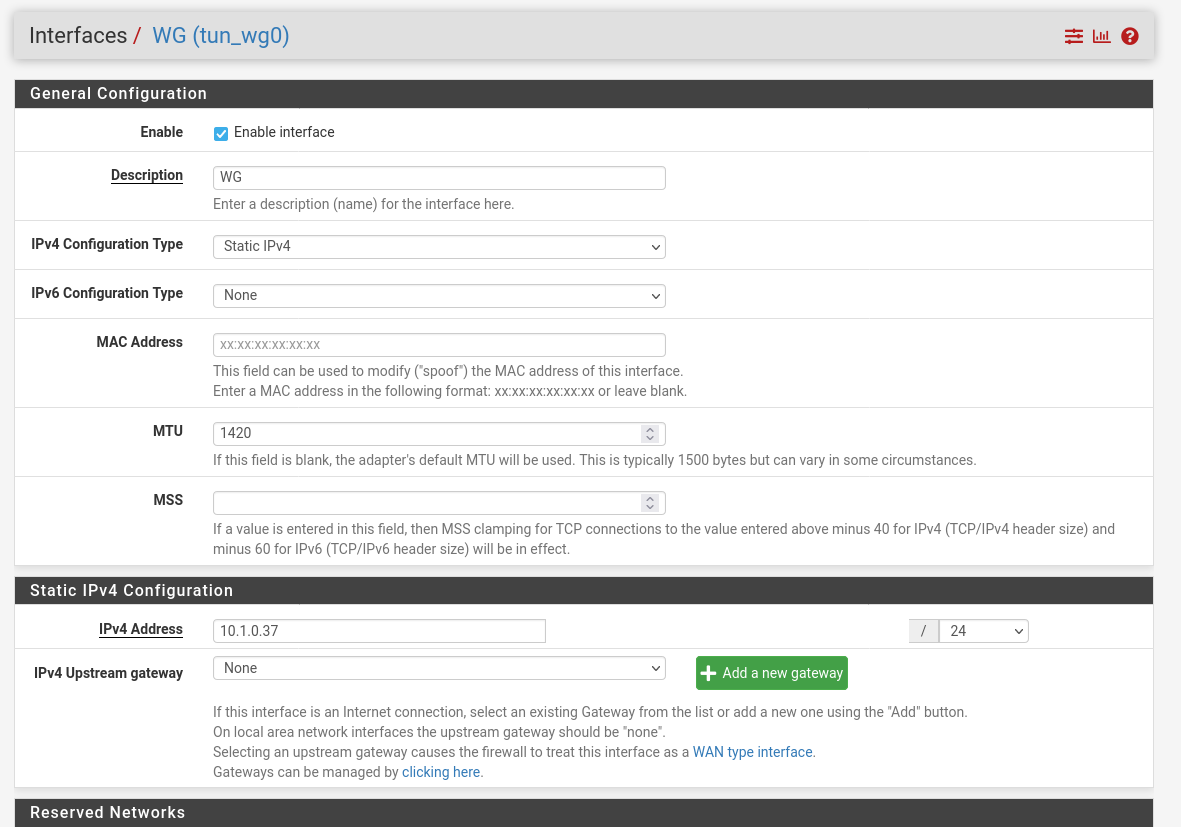
As next step we have to assign an interface to Wireguard. Go to the Interfaces tab and add an interface for wg0.

Now we have to change the settings of the interface. Change the IPv4-Type to Static-IPv4 and the MTU to 1420. Also set the IP-address for the interface to you needs, just make sure that the IP-address is not already in use.
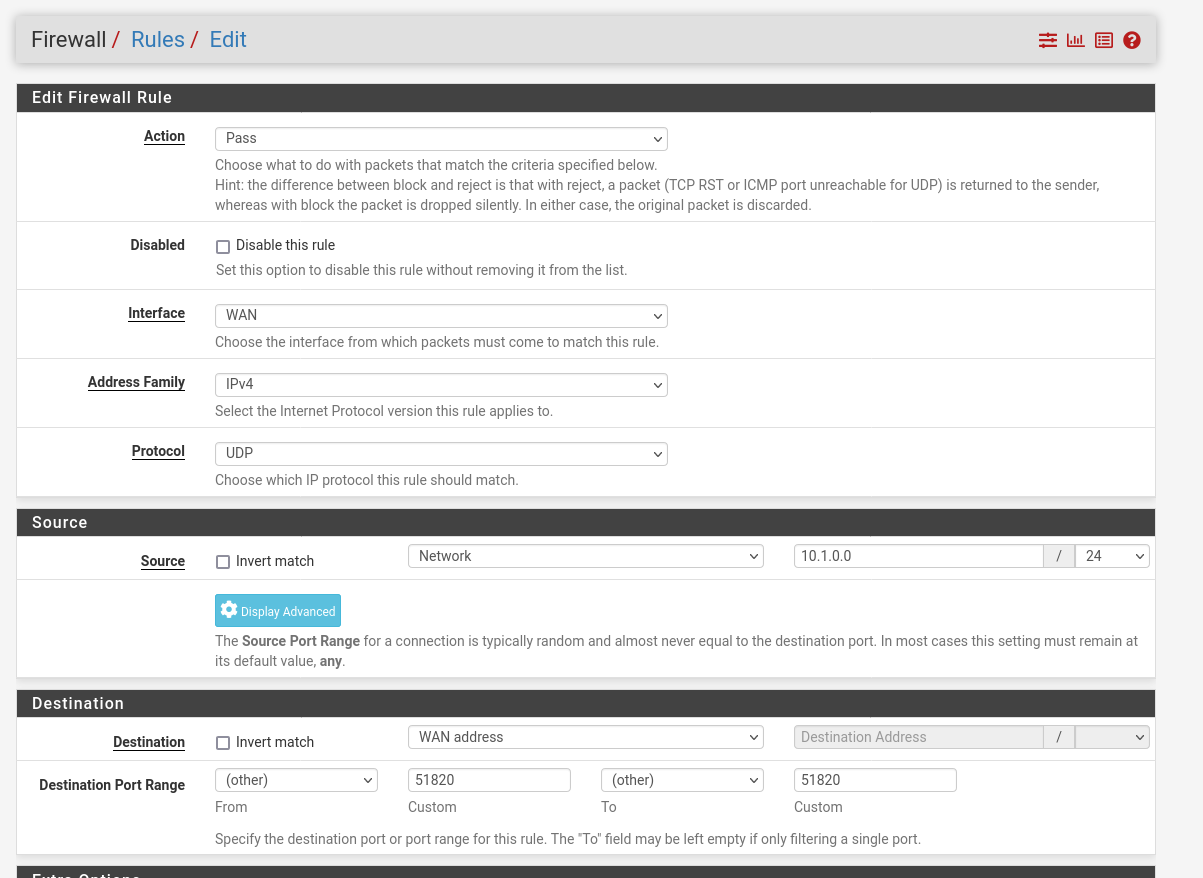
Now that we have set up Wireguard and assigned an interface, we have to create the firewall rules that the traffic can also run via port 51820.
Normally we would never open all protocols with the any rule. But for the first setup it makes troubleshooting more easier. For example, if you restrict to tcp/udp, you can reach some services but not ping and so on.
In my case I just want to use Wireguard to establish an ssh-connection to my servers which are running behind the pfSense. As we all know, from any to any is always a bad idea, so here we will restrict the access to the transfer-network and as destination we set the LAN net.
Navigate to the Wireguard index-tab and add a new rule:
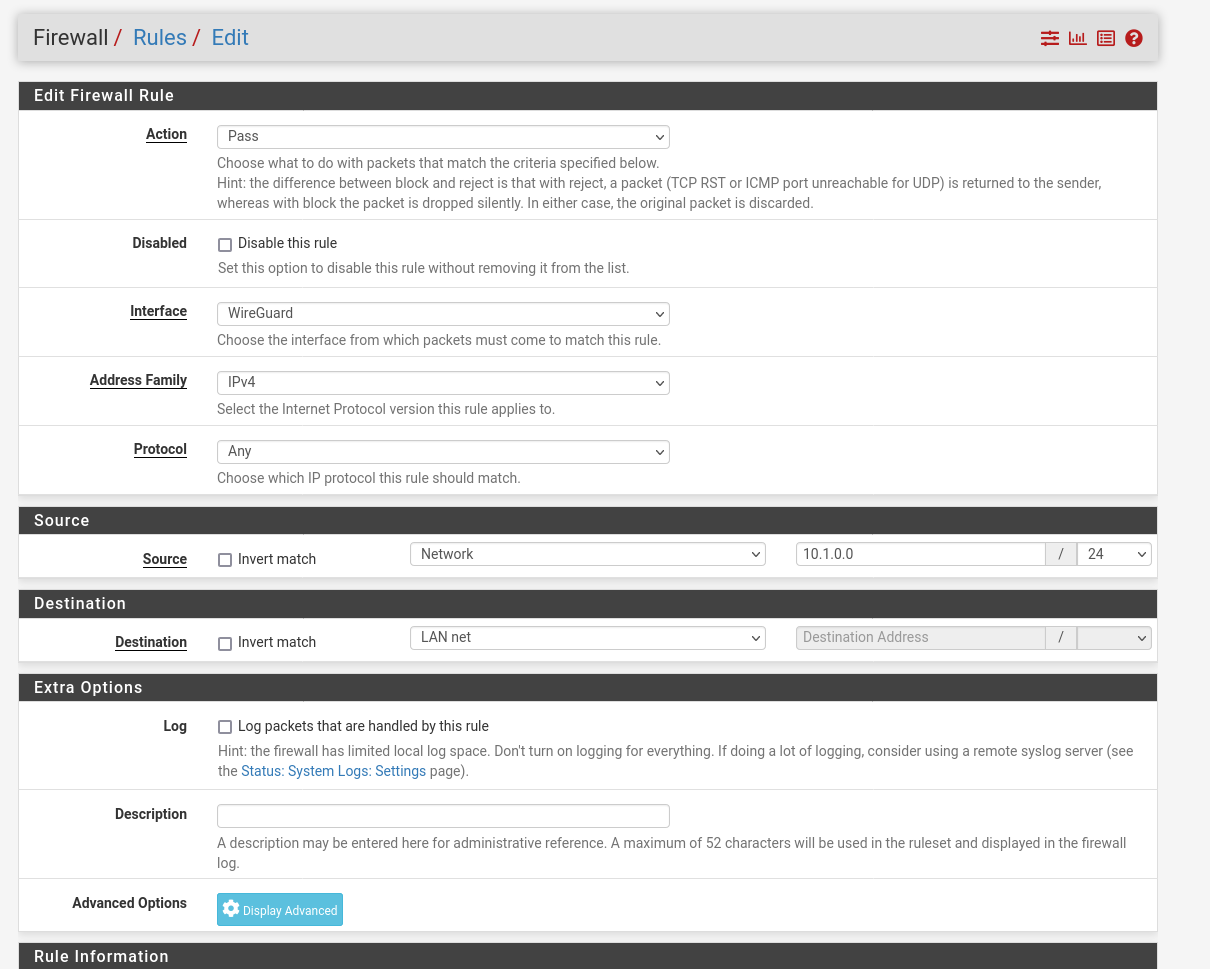
Now we have to allow traffic threw the firewall for Wireguard. Wiregaurd does not create this rules by himself. We can also restrict this a little bit more, when we set the source network to the address of our transfer network (wireguard network).
Wireguard Client
Linux
In my Case I work from a Linux-mashine but I will also add the setup for windows as well. I use PopOS here and for the sake of simplicity I install the client via the CLI.
sudo apt-get install wireguardGenerate a client public and private key pair by running the following command:
wg genkey | tee private.key | wg pubkey > public.keyNow we proceed with creation of a client configuration:
sudo vim /etc/wireguard/wg0.confAnd paste the follow, this depends on your setup in the pfSense.
The „[Interface]“ section refers to the virtual network interface on the client, while the „[Peer]“ section represents the peer, in this case the pfSense.
Important: The Address, is the IP-address that will be assigned to this client.
[Interface]
PrivateKey = <contents-of-client-privatekey>
Address = 10.1.0.15/32
PostUp = iptables -A FORWARD -i wg0 -j ACCEPT; iptables -t nat -A POSTROUTING -o eth0 -j MASQUERADE
PostDown = iptables -D FORWARD -i wg0 -j ACCEPT; iptables -t nat -D POSTROUTING -o eth0 -j MASQUERADE
ListenPort = 51820

[Peer]
PublicKey = <contents-of-server-publickey>
AllowedIPs = 10.1.0.0/24, 192.168.1.0/24
Endpoint = pfSense-IP:51820Peer
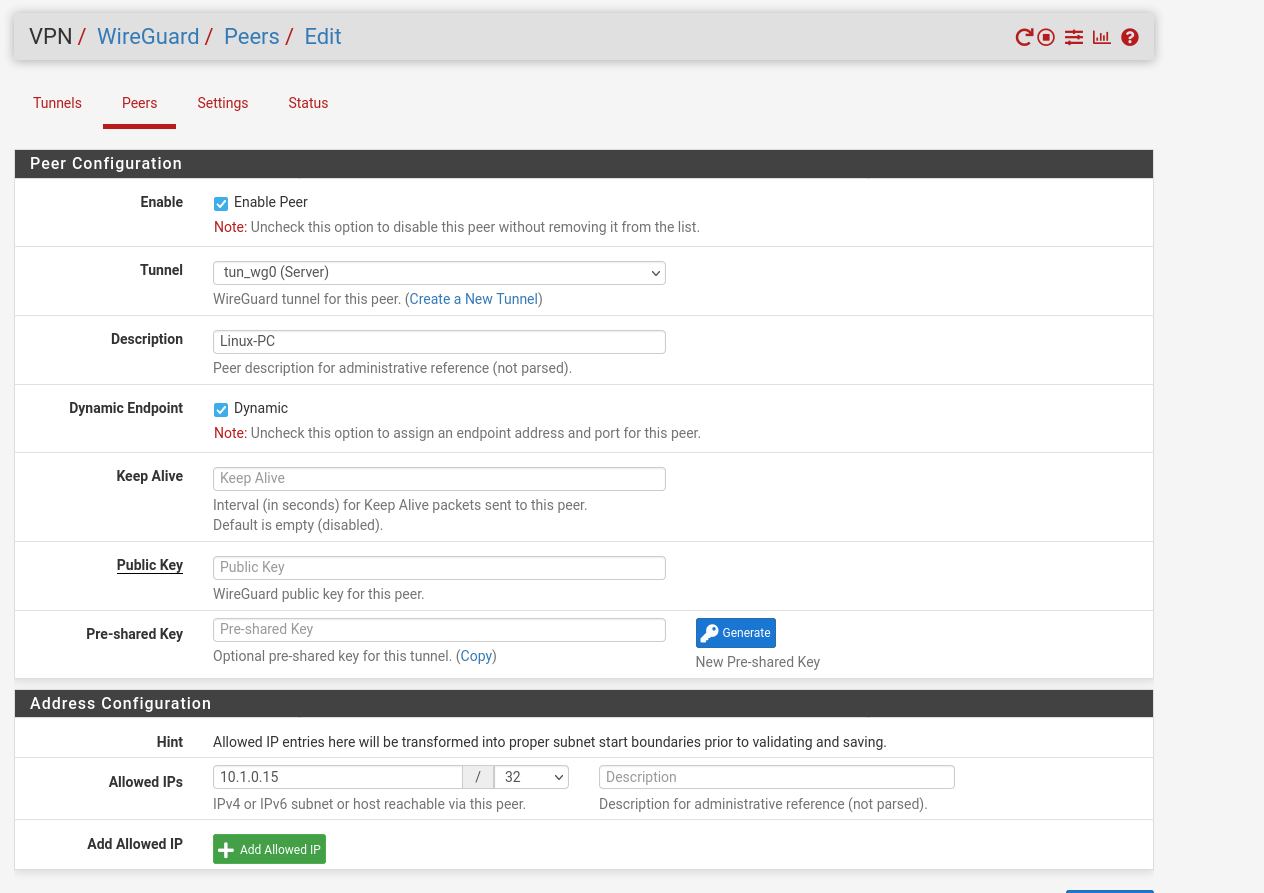
Now we are ready to go and can create a peer in the pfSense. Assign the interface, paste the public-key of your client and set the allowed IP-address to the Address from the wireguard configuration. For troubleshooting I also setup the keep alive to 30.
Now we can start our tunnel with the command:
sudo wg-quick up wg0and close with
sudo wg-quick down wg0If you have done anything right, you’ll can see established state in the firewall:
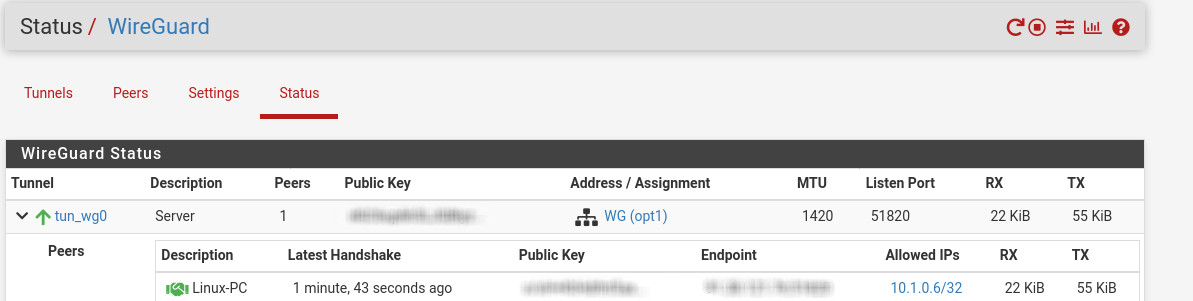
and it should also be possible to ping the GW of the LAN-interface and systems in the network:

🖤 Did this article help you?
Buy me a coffee and support my work to keep this space 🚀 and ad-free. If you can’t, share my work to reach this 📖 out to more people.